Patient Payment Plan
There are a two ways to approach patient payment plans in ZOLL Billing:
-
Automated: In an automated environment, the system watches the account for you. You set the number of days after the statement goes out in which the patient has to pay the bill and negotiate the amount they will pay. The system watches the time frame for payment to ensure that the patient is paying on time. If they do not pay within the specified number of days, both the account and its associated claims are automatically taken off the plan. Before standard payment processing continues, the account will go into suspension so you have time to review it. If you determine that the account should be placed back onto the plan, all the claims associated with the account will be queued for submission. If you decide not to put the account back onto the plan, the claims will go back into standard payment processing.
-
Manual: In a manual environment, you oversee the accounts enrolled in the plan. You establish the schedule, determine how frequently statements are issued, and how many statements are sent. Subsequently, you monitor the account activity. If a patient fails to adhere to the plan details, you manually remove the account from the plan. Furthermore, if there's no payments made after 45 days, the system automatically removes the account and its associated claims from the plan. At that time, the account is put into a Suspended status for 15 days.
Automated patient payment plans
We've automated payment plans in a couple of ways. Firstly, you can specify the number of days after the statement is issued for the patient to settle the bill. Secondly, if a payment isn't made within the specified time frame, the account and its associated claims will automatically be removed from the plan.
Configuration overview
Here is the general flow for configuring an automated patient payment plan:
-
In Settings:
-
Configure the schedule
-
Enable automated payment plan
-
Set the number of days between payment plan payments - lack of payment within this period will cause termination of the plan
-
Set the number of days the claims and account will be in a suspended status before normal payment processing resumes
-
-
Enable the payment plan for the account
The following information will provide configuration details.
Configuring payment plans in Settings
To begin, setup the payment schedule in Settings > Configuration tab > Patient billing section > Patient statements. This schedule tells the system how often to send a patient statement and the maximum statements to send. Click the fields in the schedule to select a value from the list.
Note: Payment plans do not pay attention to the maximum number of statements shown in the schedule. When you enable a payment plan the number of statements show as infinity.

Note: Under "Patient billing" there are two options. The "Invoice patients by default" option is set by default and will allow the system to queue patient claims for statements. The "Suspend patient billing by default" is used when you do not want to send a patient statement but instead want to automatically put the patient claims in a "Suspended - Pending write-off" status.
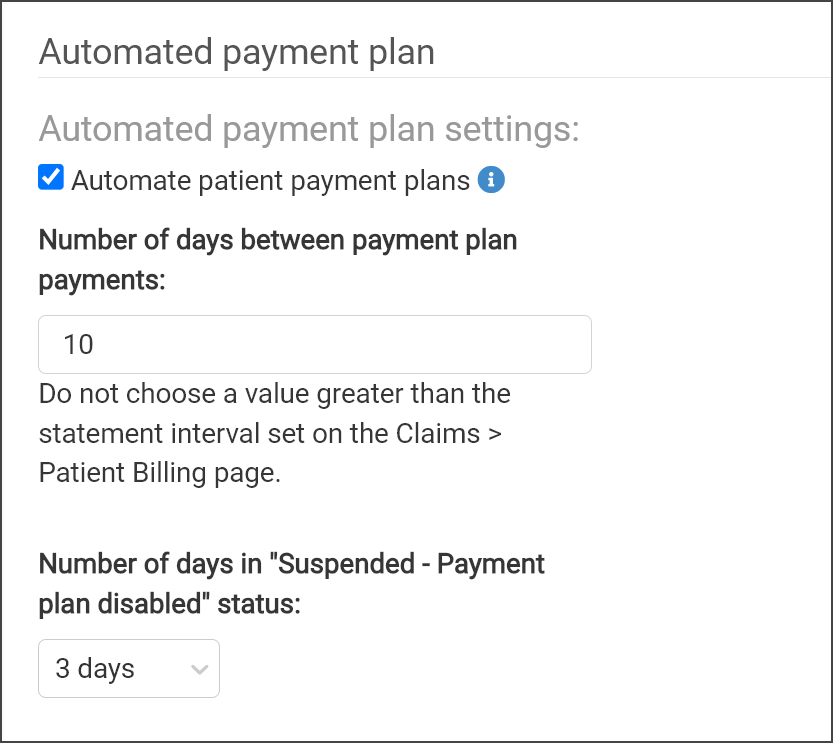
Now that you have the schedule set, you can automate the payment plan. Use the Settings > Configuration tab > Patient billing section > Automated payment plan section.
-
Automate patient payment plans: Checking this box will enable the system to automatically monitor the patient accounts.
-
Number of days between payment plan payments: The number of days between payment plan payments is very important. If the patient does not send a payment in this time frame, they will automatically be removed from the payment plan.
Note: Be careful about the number you enter in number of days field. If you enter a value that is greater than your statement interval date, then you will always be sending statements out before the interval hits and the patient will never be taken off their plan.
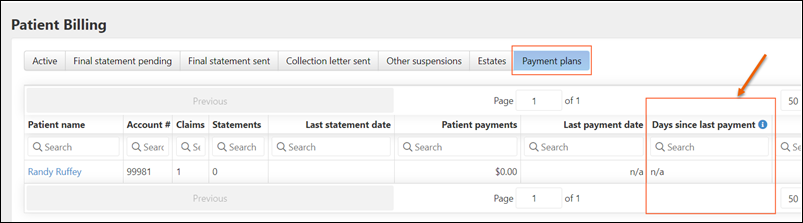
To track accounts that are close to being disabled, there is a column on the Patient Billing page > "Payment plans" tab called “Days since last payment.” This column displays the difference in the number of days from the last statement to the last payment, or if there is no payment, the days between the last statement and the start of the payment plan. This list can be viewed directly from the page or downloaded to an CSV for better management.

-
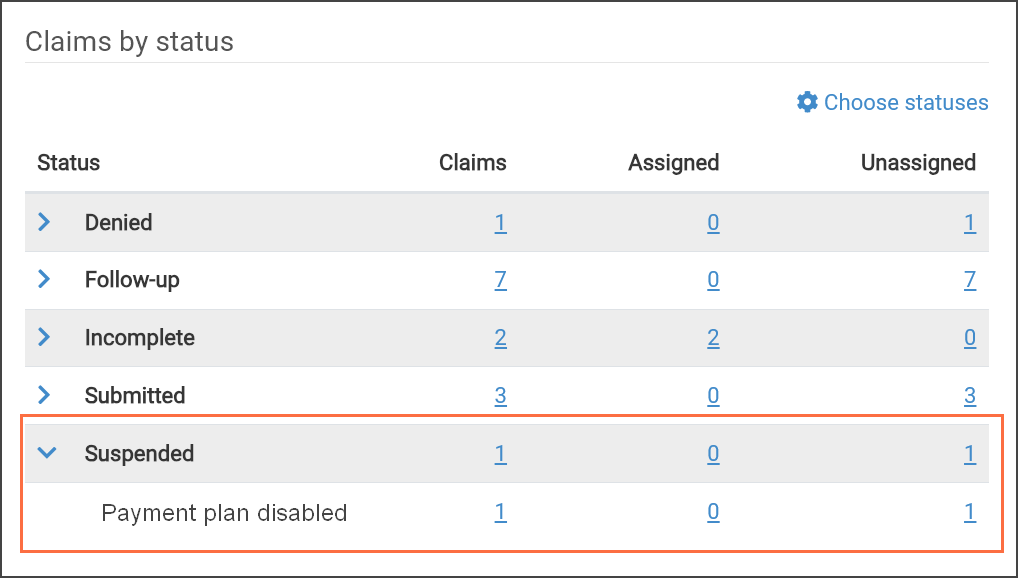
Number of days in "Suspended - Payment plan disabled" status: If the patient does not send a payment within the specified number of days, then their account and associated claims will be removed from the payment plan and put into a "Suspended - Payment plan disabled" status. This status displays in two places,
the Dashboard,

and the Patient Billing page under the "Other suspensions" tab > Suspension Reason heading.

At the end of the designated number of days in the "Suspended - Payment plan disabled" status, the system will return the account to the standard billing process. That means that it will follow the schedule that you set in the Patient billing > Patient statements section. For example, if the patient has received all of the statements, the claim(s) would be put into a "Suspended - Final statement sent" status. If the patient has not received all that statements, the claim(s) would be put into the appropriated status of "Submitted - Patient statement" or "Queued for Submission - Patient statement."

When you are done with your configurations, be sure to click Save at the bottom of the Settings page to save your changes.
Enabling the payment plan for the account
Next step? Enable the payment plan for the account. This can be done in several places.
-
Account page: Account page > Patient responsibility tab - slide the payment plan toggle to the right.
-
Patient Billing page: Claims > Patient Billing – click the review icon to open a window. Under the Patient responsibility tab > Patient statements heading, slide the payment plan toggle to the right.
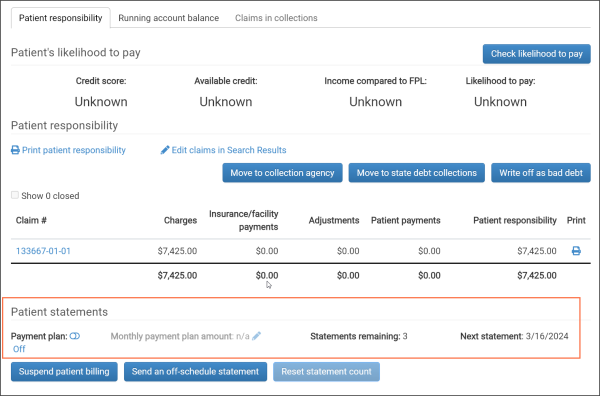

After negotiating with the patient, you now have an agree upon amount. When you turn on the payment plan the "Monthly payment plan amount" enables. Click the pencil icon to enter the amount and then click Save.

Manual patient payment plans
In a manual payment plan environment, you set the payment schedule, add the account to the payment plan, and then manually monitor the accounts.
Configuration overview
Here is the general flow to configure a manual patient payment plan:
-
Configure the payment schedule in Settings
-
Enable the payment plan for the account
Setting the payment schedule
Start with setting up the payment schedule in Settings > Configuration tab > Patient billing section > Patient statements. This schedule tells the system how often to send a patient statement and the maximum statements to send. Click the fields in the schedule to select a value from the list.
Note: Payment plans do not pay attention to the maximum number of statements shown in the schedule. When you enable a payment plan the number of statements show as infinity.
Click Save to save your changes.
Because there is no configured number of days of non-payment in a manual payment plan, we automatically disable payment plans after 45-days of non-payment. After it is disabled, you can turn an auto-disabled payment plan back on if you choose.
To track accounts that are close to being disabled, there is a column on the Patient Billing page > "Payment plans" tab called “Days since last payment.” This column displays the difference in the number of days from the last statement to the last payment, or if there is no payment, the days between the last statement and the start of the payment plan. This list can be viewed directly from the page or downloaded to an CSV for better management.
After an account is taken off of a payment plan, it is put into a Suspended status for 15-days. At the end of 15-days days in the "Suspended - Payment plan disabled" status, the system will return the account to the standard billing process. That means that it will follow the schedule that you set in the Patient billing > Patient statements section. For example, if the patient has received all of the statements, the claim(s) would be placed into a "Suspended - Final statement sent" status. If the patient has not received all the statements, the claim(s) would be placed into the appropriated status of "Submitted - Patient statement" or "Queued for Submission - Patient statement."
Enabling the payment plan for the account
Next step? Enable the payment plan for the account. This can be done in several places.
-
Account page: Account page > Patient responsibility tab - slide the payment plan toggle to the right.
-
Patient Billing page: Claims > Patient Billing – click the review icon to open a window. Under the "Patient responsibility" tab > Patient statements heading, slide the payment plan toggle to the right.
After negotiating with the patient, you now have an agree upon amount. When you turn on the payment plan the "Monthly payment plan amount" enables. Click the pencil icon to enter the amount and then click Save.
Without automating your payment plans, you will now have to watch the account for late or non-payment. In the event that the patient is not abiding with the plan's agreements, remove them from the payment plan and make a decision on how to address the account. Do you want to send more statements, write-off the balance, or send the account to collections?
Patient Billing page
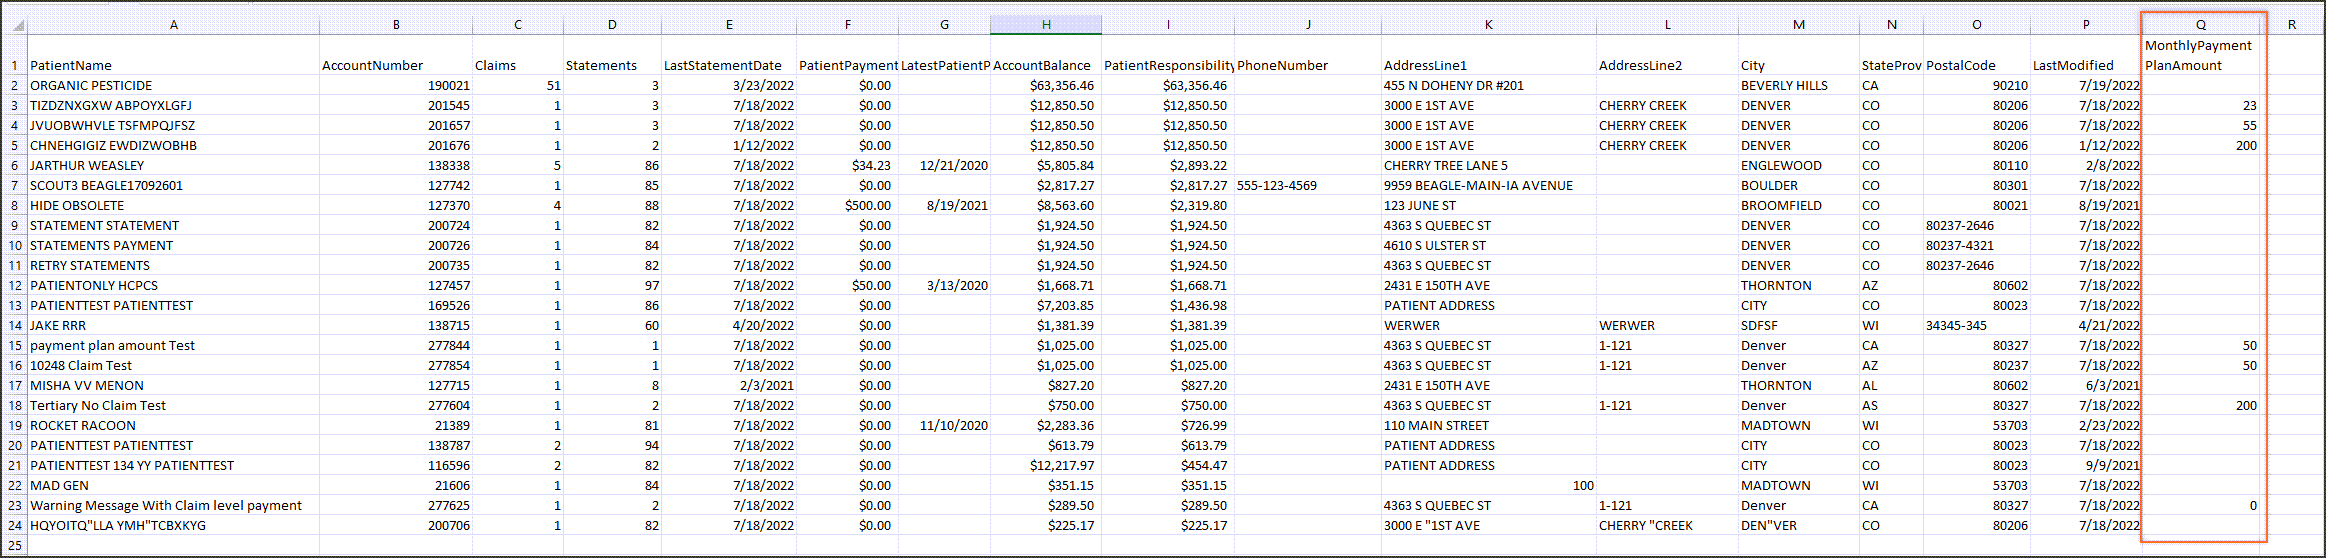
Use the "Payment plans" tab on the Patient Billing page to view information for all accounts with payment plans enabled.

The "Payment plan amount" column displays as "MontlyPaymentPlanAmount" when exported to a csv file.
Audit trail
An entry will be made to the audit trail anytime anyone enables/disables or modifies the account’s payment plan.
Who's on a payment plan?
-
On the navigation bar, click Claims and then select Patient billing.
-
On the Patient Billing page, click the Payment plans tab. A list of patients with a plan displays.
Taking a patient off a payment plan
-
On the navigation bar, click Claims and then select Patient billing.
-
On the Patient Billing page, click the Payment plans tab.
-
Find the user's name on the list. On that line, click the icon
 under the Review column.
 -
Slide the 'Payment plan' toggle to the OFF position.
-
Click Close.